Beyond the Leaf: The Art and Science of Coffee Kombucha
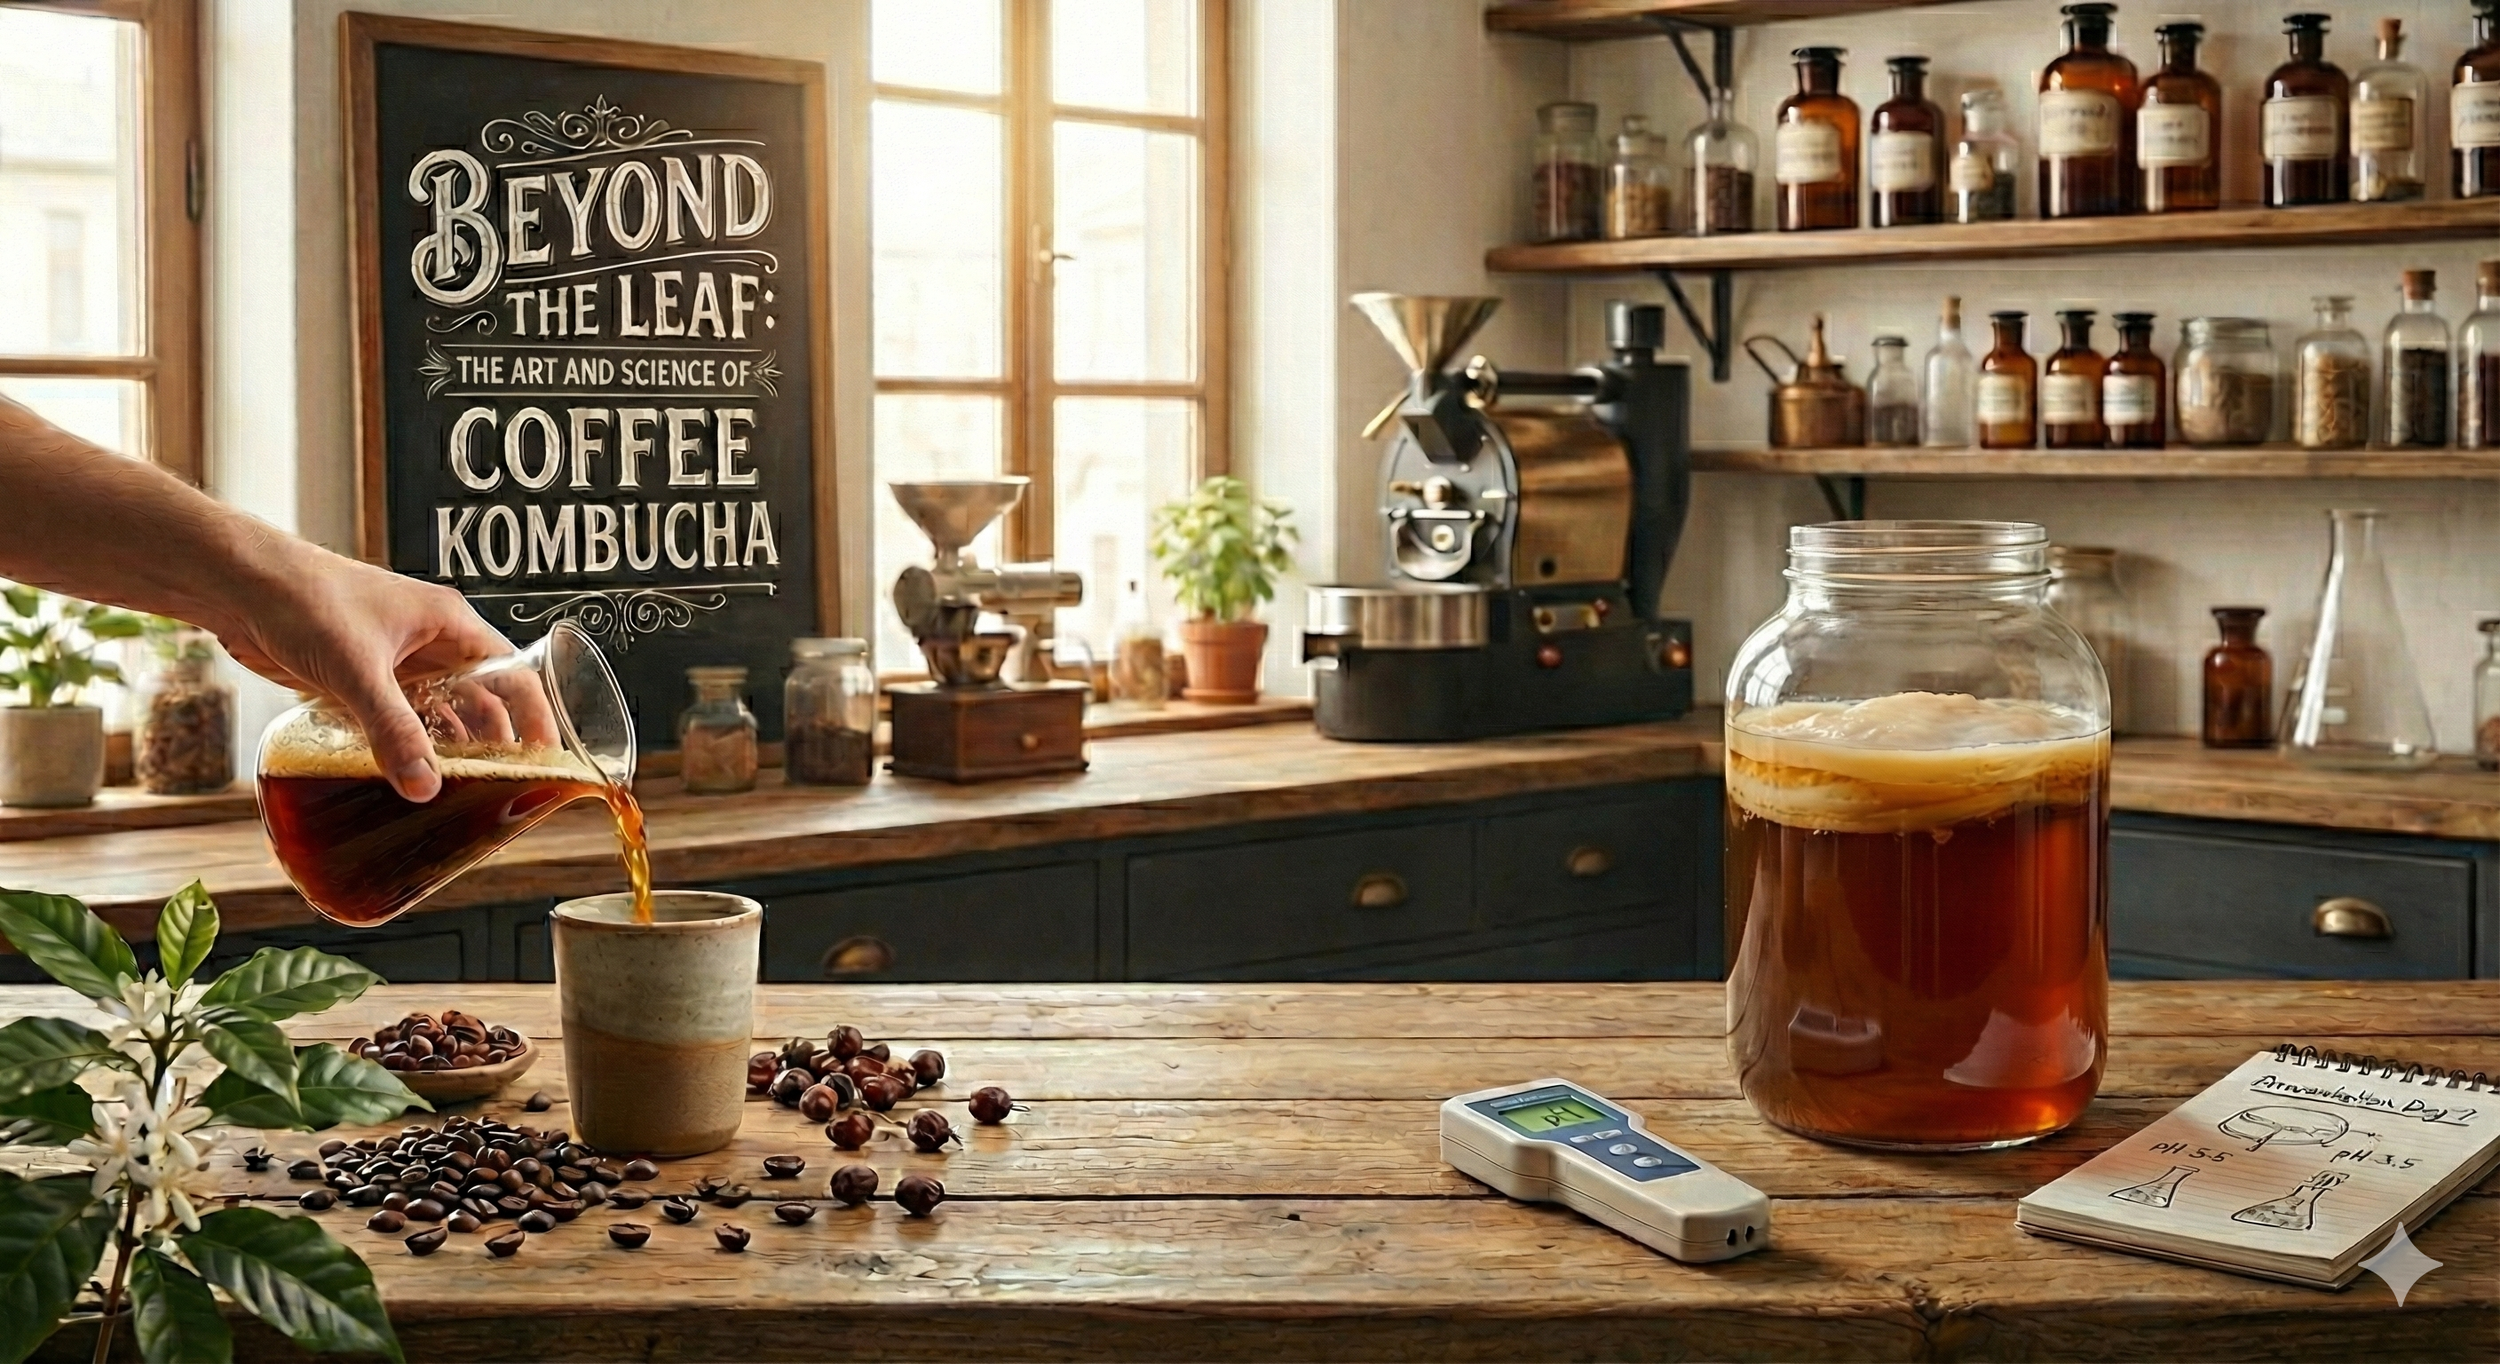
If you think kombucha is strictly a tea game, it’s time to rewrite the rules. While the symbiotic culture of bacteria and yeast (SCOBY) traditionally thrives on the tannins and nutrients found in Camellia sinensis, innovative brewers are discovering that coffee offers an entirely new, complex canvas for fermentation.
Enter Coffee Kombucha—often affectionately dubbed "Koffeecha." This isn't just cold brew with a splash of vinegar; it is a complete biochemical transformation. During fermentation, the SCOBY metabolizes the sugars and interacts with the coffee's natural compounds, softening the harsh bitterness often associated with black coffee and replacing it with a bright, effervescent tang.
The secret to a truly exceptional batch lies in the bean selection. In this recipe, we utilize a precise 50/50 blend of Colombian and Mexican beans. The Colombian beans bring a classic, mild acidity and fruity undertone, while the Mexican beans ground the brew with nutty, chocolatey depth. When fermented, these distinct profiles merge to create a beverage that is reminiscent of a sparkling, non-alcoholic stout or a sour dark ale—rich, energetic, and surprisingly refreshing.
Whether you are looking to upcycle your morning beans or seeking a probiotic energy boost, this recipe will guide you through the process of turning your favorite morning ritual into a living, effervescent elixir.
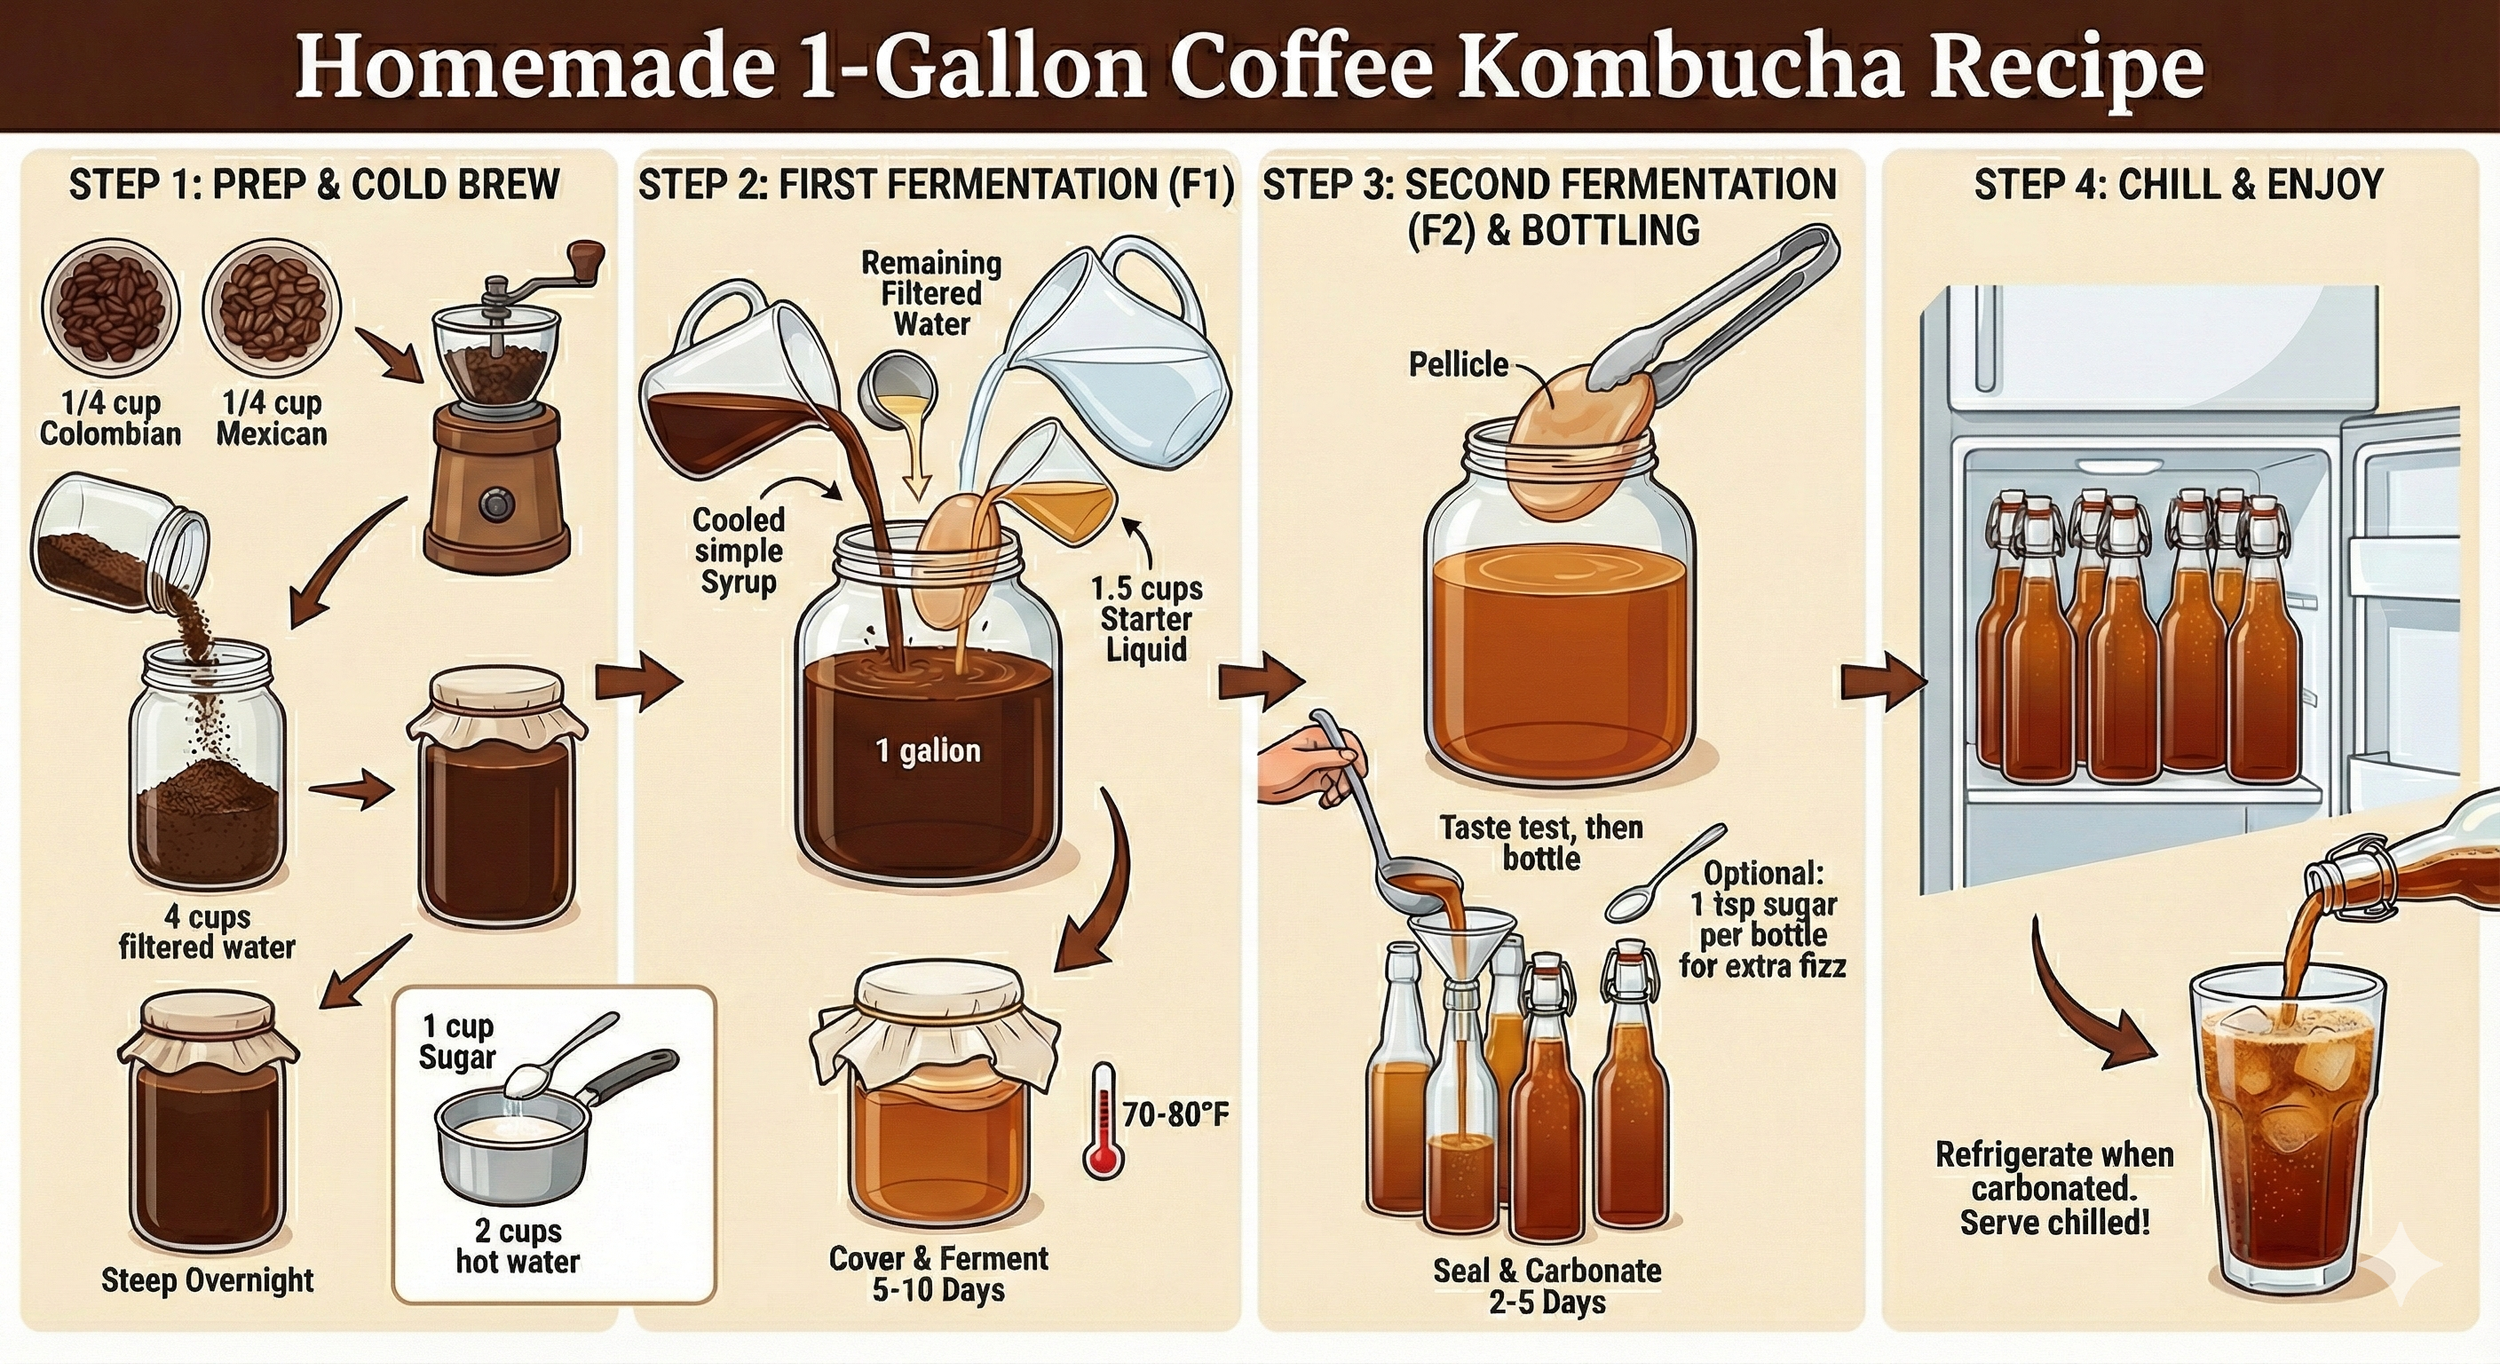
This recipe uses a cold-brew method to create a smooth, less acidic coffee base that works well with the fermentation process.
Yields: 1 Gallon Prep time: 12-24 hours (for cold brew) + 30 minutes active time Fermentation time: 7-14 days total
Ingredients
Coffee:
1/4 cup Colombian coffee beans (whole)
1/4 cup Mexican coffee beans (whole)
Water:
12-14 cups of filtered water (divided usage)
Sugar:
1 cup organic cane sugar (for the SCOBY to eat)
Culture:
1 pellicle
1.5 cups starter liquid (plain, unflavored kombucha from a previous batch)
Optional for Bottling:
1 tsp sugar per bottle for extra carbonation
Equipment
Coffee grinder
Large jar or pitcher for cold brewing
Fine-mesh sieve or cheesecloth
1-gallon glass brewing jar
Breathable cloth cover (cotton cloth or large coffee filter) & rubber band
Flip-top glass bottles for second fermentation
Instructions
Part 1: Prep & Cold Brew
Grind the Beans: Coarsely grind the 1/4 cup Colombian and 1/4 cup Mexican coffee beans together.
Make Cold Brew Concentrate: In a large jar or pitcher, combine the coarse coffee grounds with 4 cups of cool, filtered water. Stir well to ensure all grounds are saturated. Cover and let steep at room temperature for 12-24 hours. Alternatively, and of course much quicker, steep the coffee for ten minutes using your brewing method of choice.
Make Simple Syrup: While the coffee steeps, bring 2 cups of water to a simmer in a small pot. Remove from heat and stir in the 1 cup of sugar until completely dissolved. Let this syrup cool to room temperature.
Part 2: First Fermentation (F1)
Strain & Combine: Place a fine-mesh sieve or several layers of cheesecloth over your 1-gallon brewing jar and strain the cold-brew coffee into it. Add the cooled sugar syrup.
Top Up: Pour in the remaining filtered water (6-8 cups) to fill the jar, leaving two to three inches of headspace at the top.
Add Culture: With tongs, gently place the pellicle into the sweet coffee mixture. Pour the 1.5 cups of starter liquid directly over the pellicle.
Cover & Ferment: Cover the jar opening with your breathable cloth and secure it with a rubber band to keep out pests while allowing airflow. Place the jar in a warm (70-80°F), ventilated area out of direct sunlight. Let it ferment for 5-10 days.
Tip: Start tasting daily after day 5. The kombucha is ready when it has a pleasant balance of sweetness and tart acidity that you enjoy.
Part 3: Second Fermentation (F2) & Bottling
Remove Pellicle: Once the brew tastes right to you, remove the pellicle and set it aside with about 1-2 cups of the finished kombucha to use as starter for your next batch.
Stir & Bottle: Give the remaining kombucha in the big jar a gentle stir to distribute yeasts evenly. Using a funnel, pour the kombucha into your flip-top bottles, leaving about 1 inch of headspace in each.
Optional: For extra fizz, add 1 tsp of sugar to each bottle before sealing.
Carbonate: Seal the bottles tight. Let them sit at room temperature for 2-5 days to allow carbonation to build. You can test one bottle after 2 days to check the fizz level.
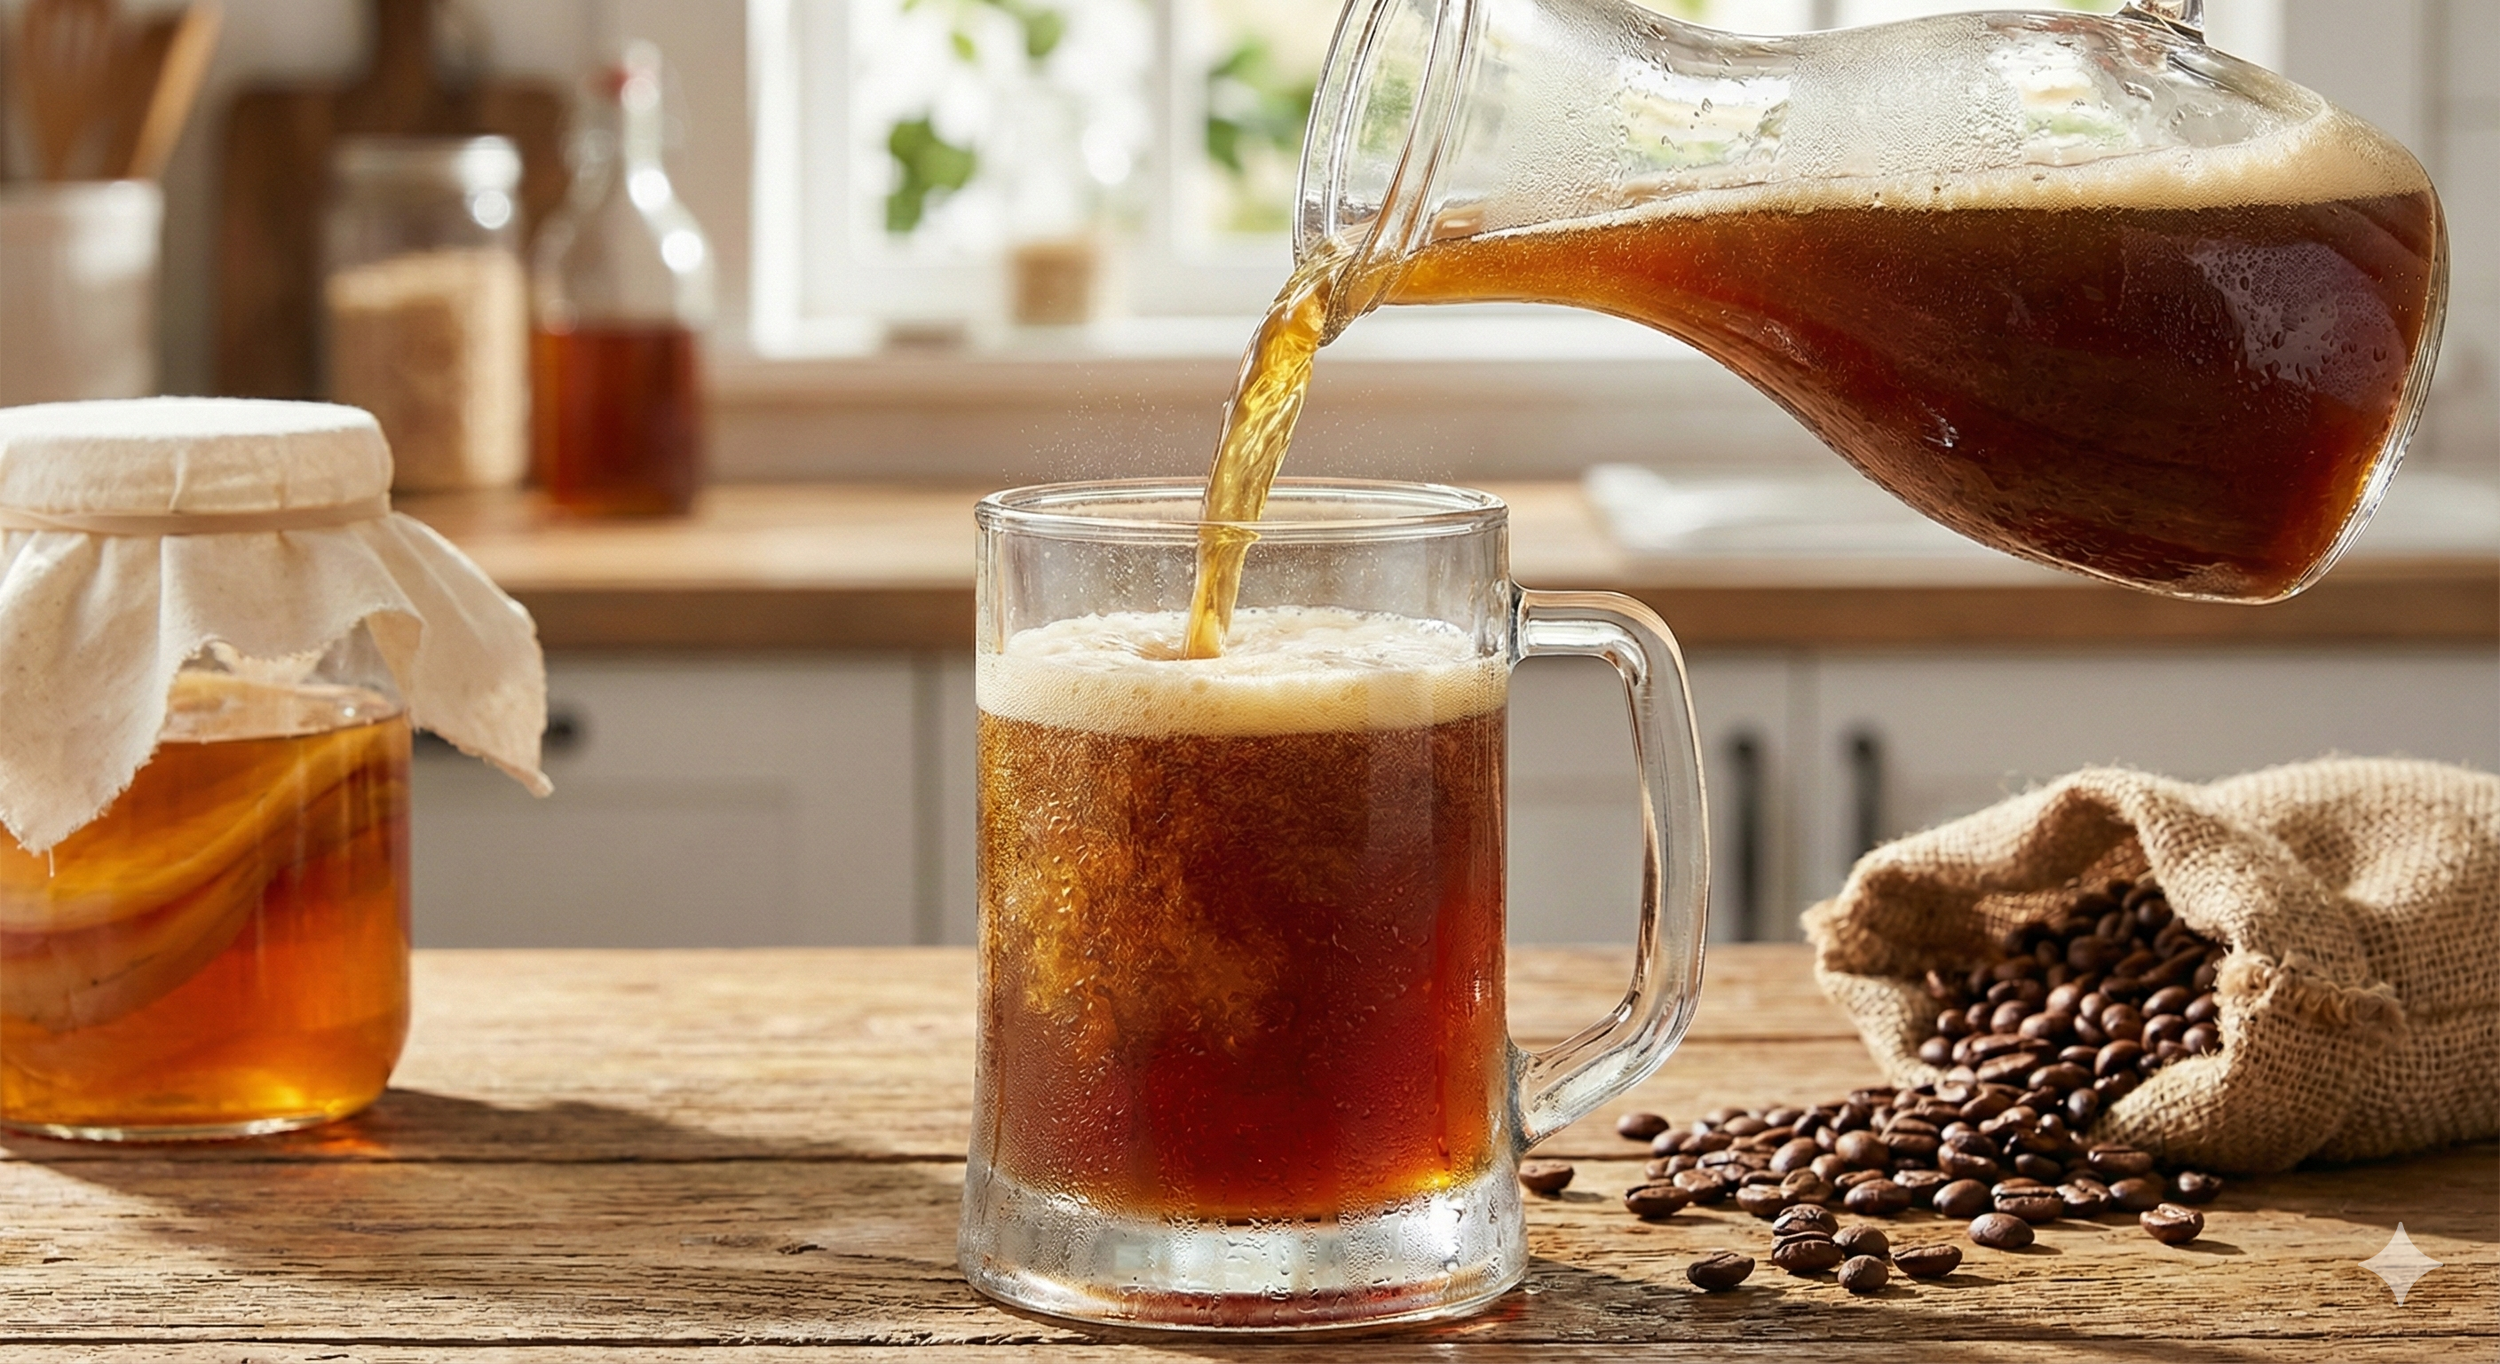
Part 4: Chill & Enjoy
Refrigerate: Once carbonated to your liking, move all the bottles to the refrigerator. This stops the fermentation process. Chill thoroughly before serving. Enjoy your homemade coffee kombucha!
Note: Once a pellicle has been used for coffee, it will take on the coffee flavor and color. It's best to keep it dedicated to making coffee kombucha and not use it for tea-based brews.
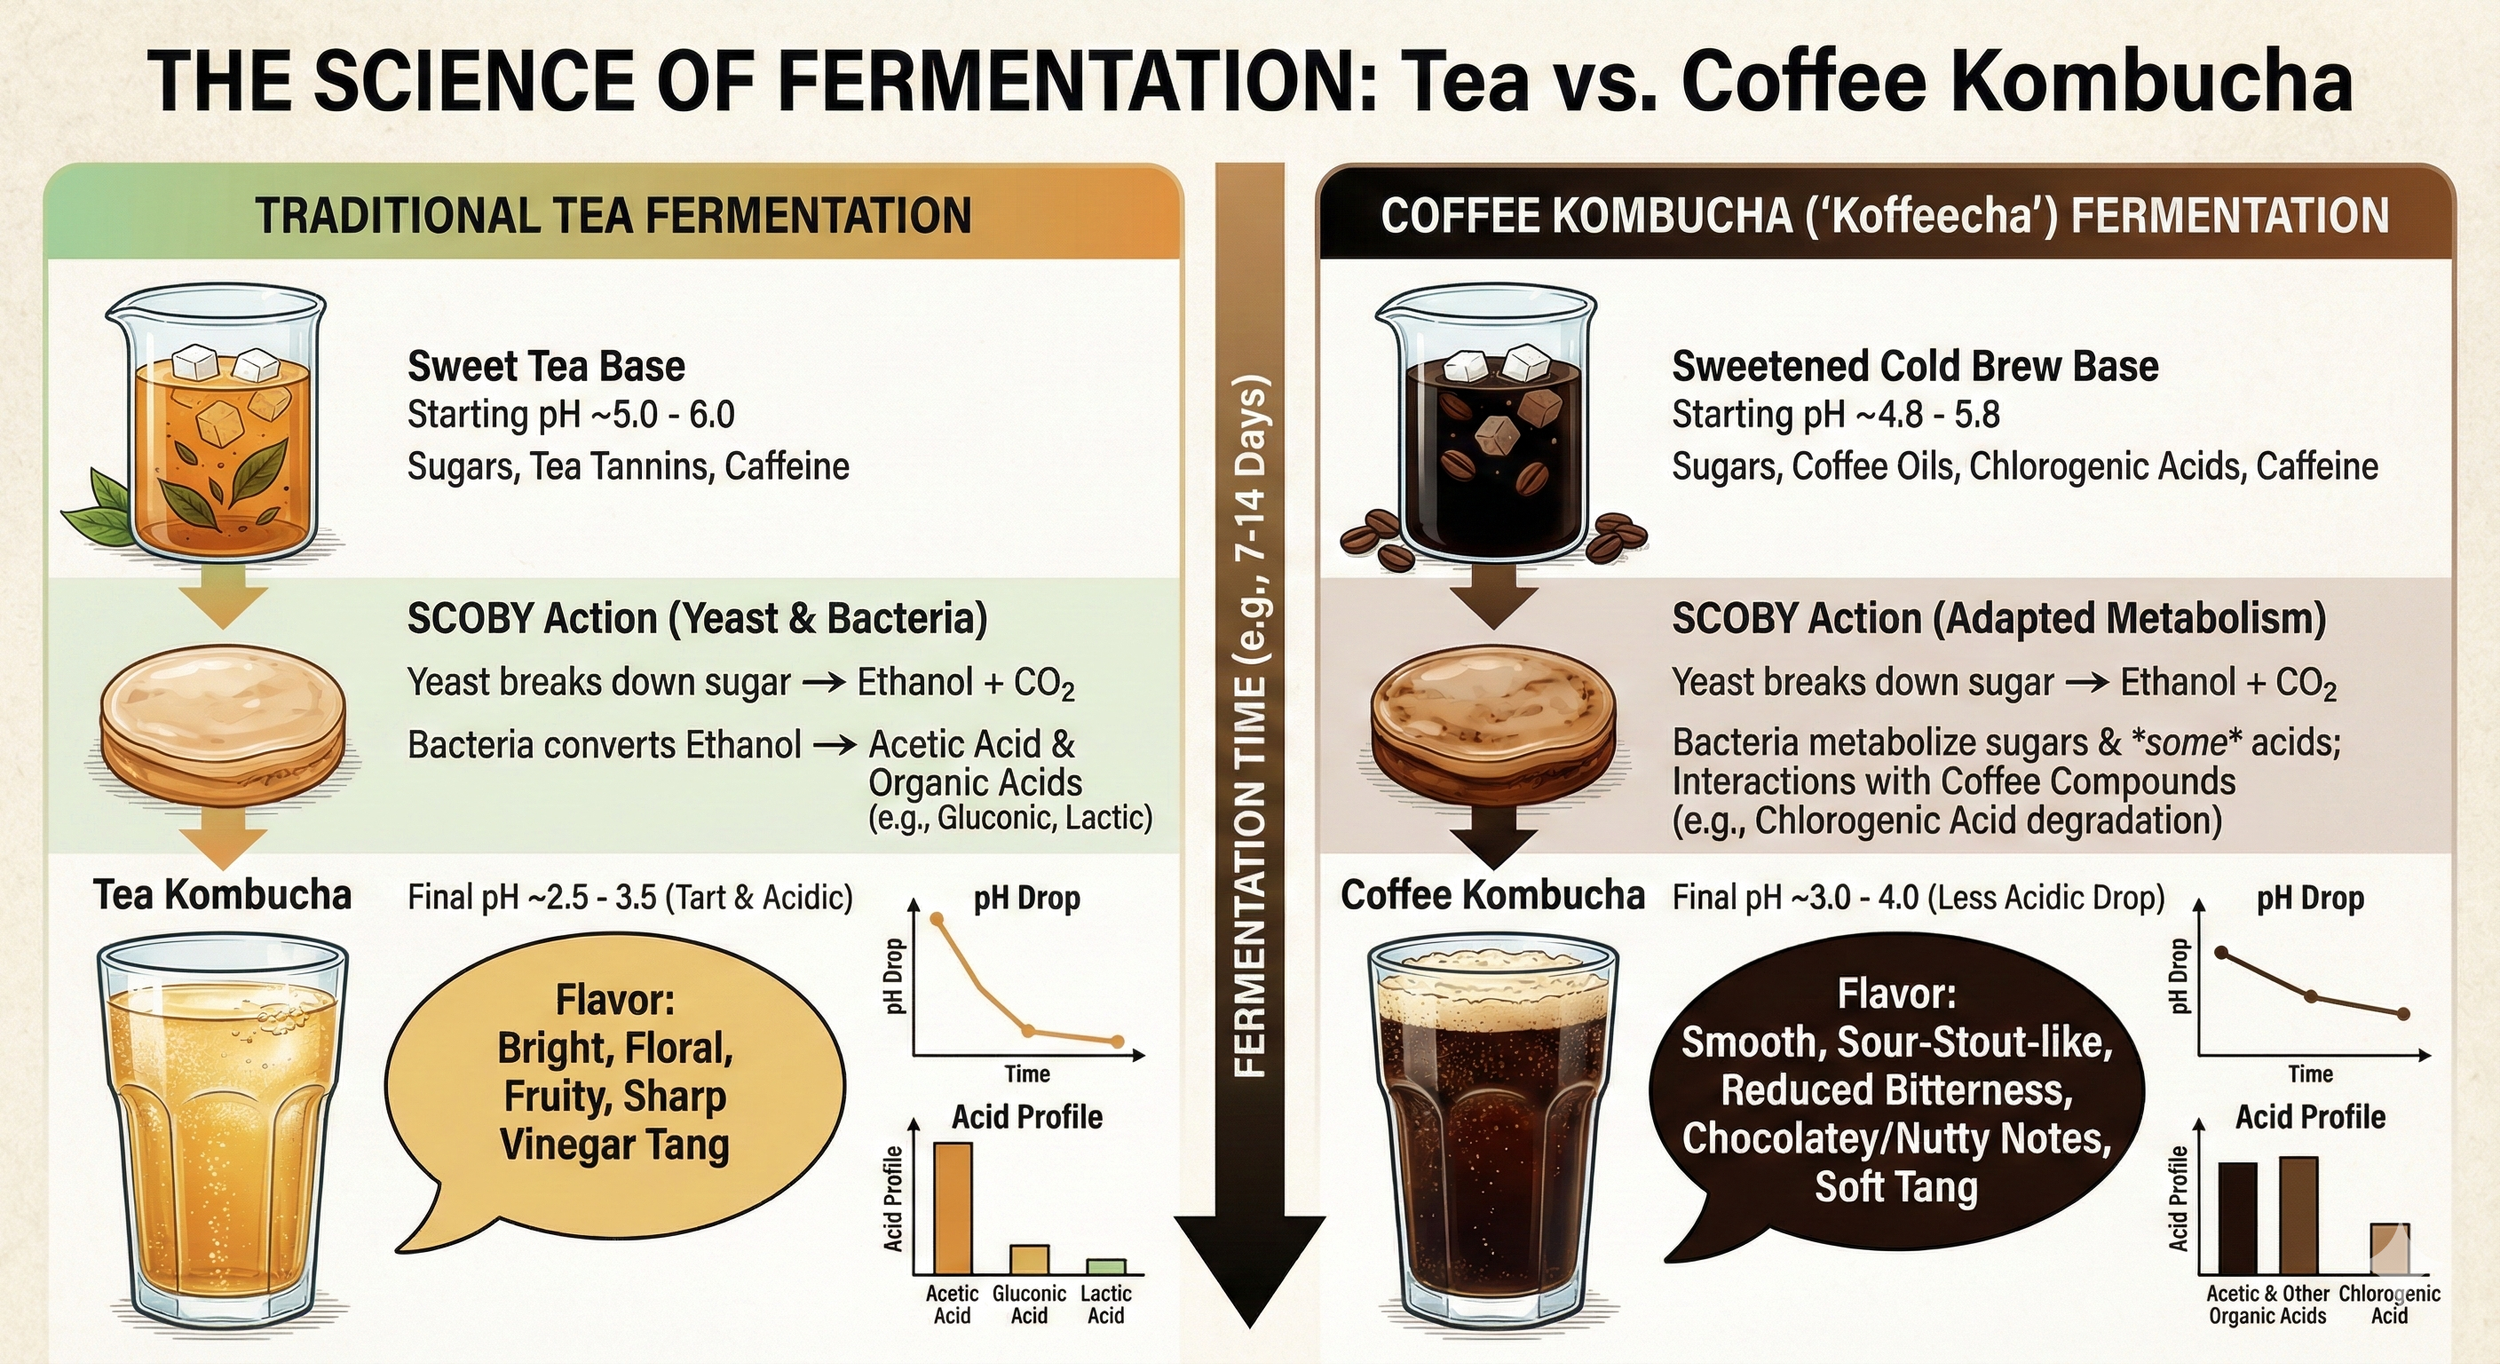
Note
The starting pH when brewing kombucha should be 4.5 or below. The infographic provides the pH without the pellicle and starting liquid added.
The Final Pour
Mastering the art of coffee kombucha is more than just following a recipe; it is an exercise in delicious alchemy. By guiding your SCOBY through the unique landscape of roasted coffee beans instead of tea leaves, you have successfully bridged the gap between your morning ritual and functional fermentation.
As your finished brew chills, remember that the science is in the taste. That symbiotic relationship between bacteria and yeast has worked to soften the harsh edges of the caffeine and chlorogenic acids, transforming a simple cold brew into something far more complex. The result of using that specific Colombian and Mexican blend isn't just a sour coffee; it's a effervescent, velvety beverage that balances the deep, chocolatey floral notes of the beans with a bright, lactic tang reminiscent of a well-crafted sour stout.
Serving Your Creation
To truly appreciate the nuance of your "Koffeecha," treat it with the same reverence you would a craft beer or a high-end coffee mocktail:
The Stout Pour: Serve it well-chilled in a pint glass or tulip glass without ice to appreciate the foamy head and rich aroma.
The Mocktail Base: Pour it over a large ice cube with a twist of orange peel to highlight the fruity undertones of the Colombian beans.
The Dessert Float: For an indulgent treat, pour it over a scoop of vanilla bean ice cream for a probiotic affogato.
You have successfully stepped "beyond the leaf." Now, raise a glass to the fascinating biology in your cup and enjoy the buzzing, complex reward of your patience. Cheers to your brew!